
By ToolBrivio Editorial · Tested in OBS Studio 30.2.3 on Debian Linux, October 14, 2026, with generated test tones; editor and service imports not tested. Source links earn no affiliate commission. Research approach · Disclosure.
Use Remux Recordings, then test the delivery copy
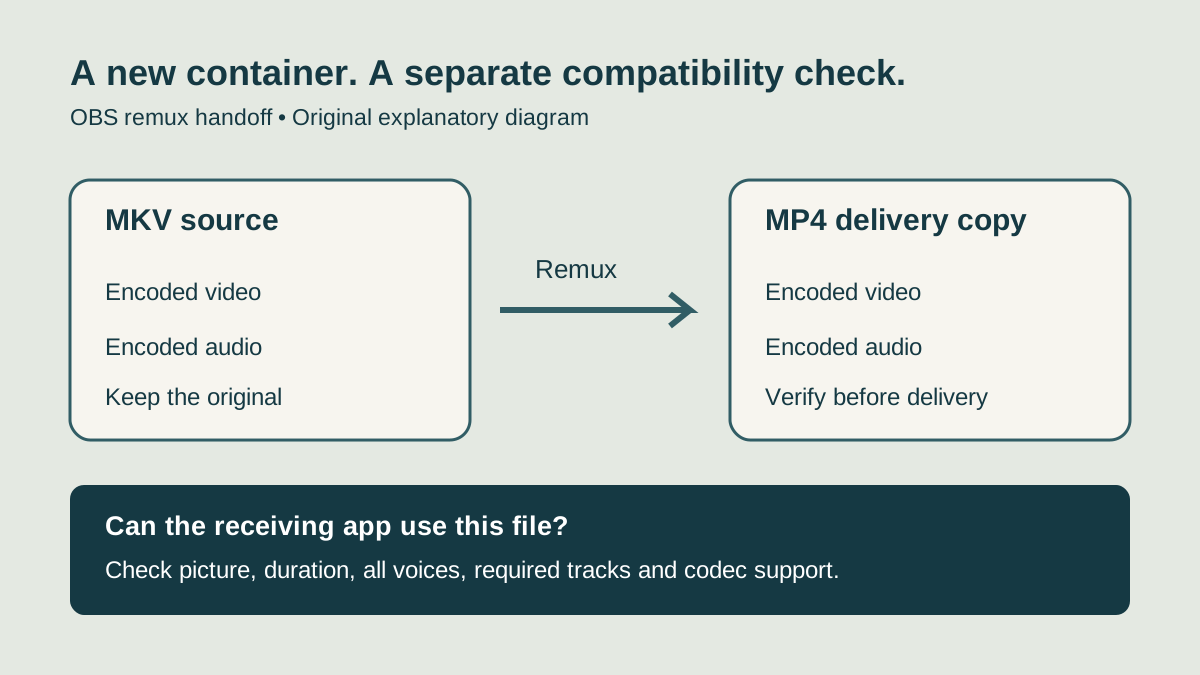
In OBS, open File → Remux Recordings, select the completed MKV recording with the … control, and click Remux. Wait for completion. Open the resulting MP4 in the application that will actually receive it before deleting anything.
An editor asks for MP4, but your recording folder contains an MKV. You do not need to repeat the recording simply because its container is different. OBS includes a remux tool for this handoff. The important question is whether changing the container is enough—or whether the recipient also needs different video encoding or a particular audio mix.
Test note: On October 14, 2026 we ran OBS Studio 30.2.3 on Debian Linux and recorded two 10-second 1280x720, 30 fps MKV files with x264 video and three AAC audio tracks. Then we remuxed one with File → Remux Recordings and let Automatically remux to mp4 handle the other. The two generated test tones (440 Hz and 880 Hz), played by OBS media sources, stood in for the microphone and desktop audio because the test machine had no audio devices. A real microphone and real desktop audio capture were not tested. We checked the files with ffprobe and ffmpeg, not in an editor. Crash recovery, hybrid MP4, remux error messages and editor or transcription-service imports are still based on OBS documentation only. The worked example and checklist below are planning aids, not measured results. Menu labels may vary by version and platform.
What we saw in the test
- Remux dialog: In OBS 30.2.3, File → Remux Recordings opens a table with an OBS Recording cell (with a … browse button) and a Target File cell. After we entered the MKV, the target filled in automatically with the same name and an
.mp4extension. Clicking Remux ended with a “Recording remuxed” prompt, and the MKV was left in place. - No re-encode: ffprobe showed the same H.264 High 1280x720 video and three AAC LC 48 kHz stereo tracks in the MKV and the MP4. MD5 checksums of the video and all three audio streams matched exactly between the two files.
- All tracks kept: Track 1 (both tones), Track 2 (440 Hz only) and Track 3 (880 Hz only) came through the MP4 with the same content as in the MKV.
Watch out after remuxing
In our OBS 30.2.3 test on Linux:
- Track titles were dropped. The MKV labeled its audio streams
Track1,Track2andTrack3. In the MP4 those titles were gone; each stream showed only a genericSoundHandlerhandler name. Send the track map in your delivery note. - Only the first audio track was marked default. In the MP4, only audio stream 1 carried the
defaultflag. A player that respects that flag will start on Track 1, so keep Track 1 as the full mix. - Reported duration differed slightly. ffprobe reported 10.10 s for the MKV and 10.07 s for the MP4, a 0.03 s difference, even though the streams were identical. A difference that small is a container-reporting detail. A gap of seconds needs investigating.
What remuxing changes
A container, such as MKV or MP4, packages video and audio streams. A codec, such as H.264 or HEVC, describes how a stream is encoded. Our reading of OBS’s remux implementation shows it repackaging existing encoded streams rather than choosing a new video codec. Our test agreed: the stream checksums did not change. It does not improve a blurry picture or clean up speech.
That distinction gives you a useful troubleshooting rule: an MP4 filename does not establish that a destination can decode everything inside it. The OBS formats guide separates container and codec compatibility. Verify the recipient’s requirements rather than treating MP4 as a universal acceptance guarantee.
1. Preserve the source before converting
Stop recording and locate the completed MKV. Note its filename, duration and location. Keep it as your source copy while you create and verify the delivery version. If you are unsure whether you have the full session, check the opening and closing passages before continuing.
OBS’s standard output guide recommends MKV for resilience when a recording stops unexpectedly. This does not mean every damaged or incomplete recording is recoverable. Remuxing cannot recreate speech that was never captured.
Allow space for the delivery copy alongside the original. Use a filename that makes the relationship obvious: screen-demo-source.mkv and screen-demo-delivery.mp4. Avoid naming an unchecked file “approved” or “final.”
2. Run the built-in remux tool
- Open File → Remux Recordings in OBS.
- Use the … selector to choose your completed MKV.
- Keep the source you are preserving; do not overwrite or delete it while preparing the delivery copy.
- Click Remux and wait for the completion prompt.
- Find the output MP4 and check it in your intended editor or destination.
Renaming .mkv to .mp4 is not this operation. The tool must create the new container. If it reports an error, keep the original, record the message, and investigate that failure before handing off the file.
3. Check the file where it will be used
A preview in an ordinary player is helpful, but an editor import is a separate check. For a transcription workflow, confirm the service’s current accepted formats and limits, then verify which voices are audible in the submitted file. We have not tested this MP4 against Descript, Happy Scribe or any other service.
- Picture: Inspect the opening, a middle point and the ending. Check that the intended screen or camera is visible.
- Duration: Compare source and delivery lengths. Investigate a substantial difference instead of assuming the transfer succeeded.
- Speech: Listen to every expected participant, including the quieter voice.
- Tracks: In a tool that exposes them, check each track needed for editing. Do not assume a player mixes isolated tracks together.
- Destination: Import the actual delivery file into the receiving application and verify picture and sound there.
The official multitrack guide explains that standard players generally play one audio track. If your reference mix, microphone and desktop sound were recorded separately, playback of one isolated track can sound incomplete. Our separate-track recording guide covers the capture setup.
A worked handoff example
Suppose you recorded a ten-minute software demonstration. Your plan was Track 1 for the full mix, Track 2 for microphone and Track 3 for desktop sound. These are hypothetical filenames and expectations; they are not a measured remux result.
| File or item | Purpose | Accept only after |
|---|---|---|
| screen-demo-source.mkv | Preserved capture | Confirming the expected session is present |
| screen-demo-delivery.mp4 | Editor delivery copy | Opening it in the receiving editor |
| Track 1: full mix | Listening reference | Hearing microphone and intended desktop sound |
| Tracks 2 and 3 | Independent balancing | Checking the expected isolation in the editor |
For transcription, the microphone-only track would be a poor choice if a second speaker exists only in desktop call audio. Listen for everyone before preparing the upload. Remuxing is a packaging step, not a decision about whose speech belongs in the transcript.
If the MP4 still will not work
| Symptom | Next check |
|---|---|
| MP4 opens in a player but not the editor | Compare the actual video/audio codecs with that editor’s supported inputs. Record the import error. |
| One voice is missing in playback | Inspect the selected audio track and original source routing. Compare with the MKV. |
| Both copies contain missing or distorted speech | Investigate capture, source selection and levels. Remuxing is not an audio repair. |
| The service rejects the upload | Check its file-size, duration, codec and format rules separately; do not assume the extension explains the rejection. |
| Remux fails or output appears incomplete | Preserve the MKV, check storage and destination access, and retain the error message for diagnosis. |
If the recipient needs a different codec, use an appropriate encoding/export workflow after verifying its requirements. Repeating the same remux will not make that choice for you. Keep an untouched source so troubleshooting and later edits remain possible.
Automatic remuxing and future recordings
The standard output guide documents Settings → Advanced → Automatically remux to mp4, which runs after recording stops. In OBS 30.2.3 the checkbox is in the Recording group on that page. In our second test recording, it left both the original MKV and a new MP4 in the recording folder. The MP4 had the same three tracks and the same caveats about titles, default flag and duration. It can remove a repetitive manual step; it does not replace destination verification.
Also distinguish regular MP4 from OBS’s hybrid and fragmented formats. We did not test hybrid or fragmented MP4. The current hybrid-format guide describes the use of fragments and finalization for hybrid recording. Do not apply an old warning about regular MP4 finalization to every option carrying an MP4 name. This tutorial is specifically for an existing MKV that needs a delivery copy.
Send a verification note with the file
Record the source and delivery names, expected duration, audio mapping, receiving application and checks actually completed. Mark unperformed checks as pending. This lets the next person distinguish “remux completed” from “ready to use.”
Download the remux delivery checklist (TXT)